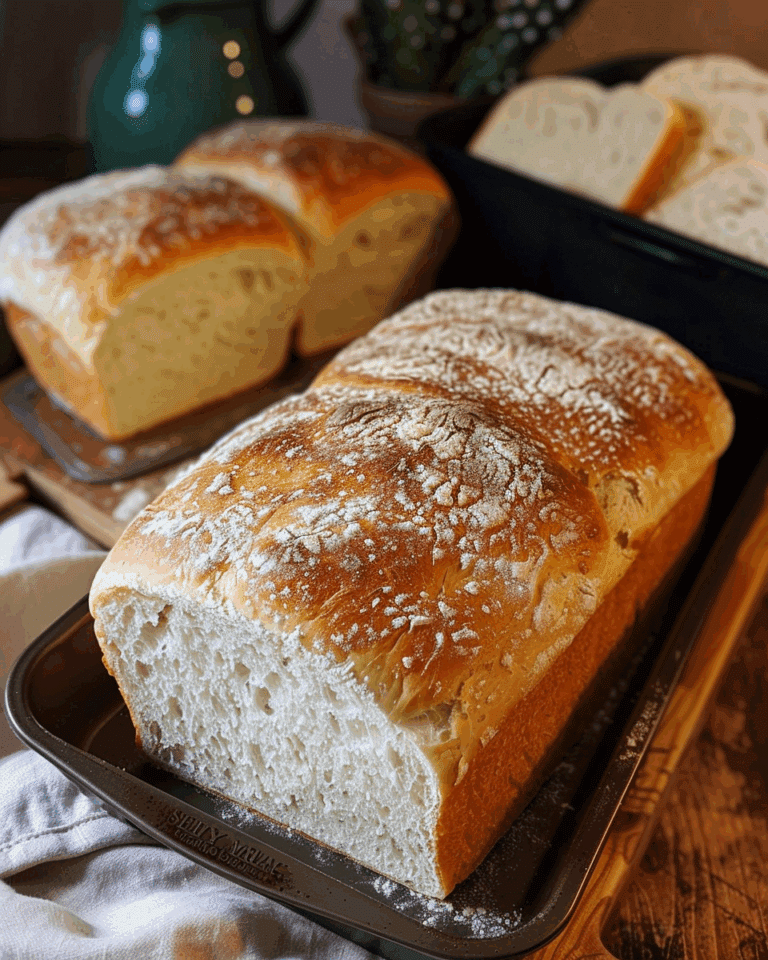
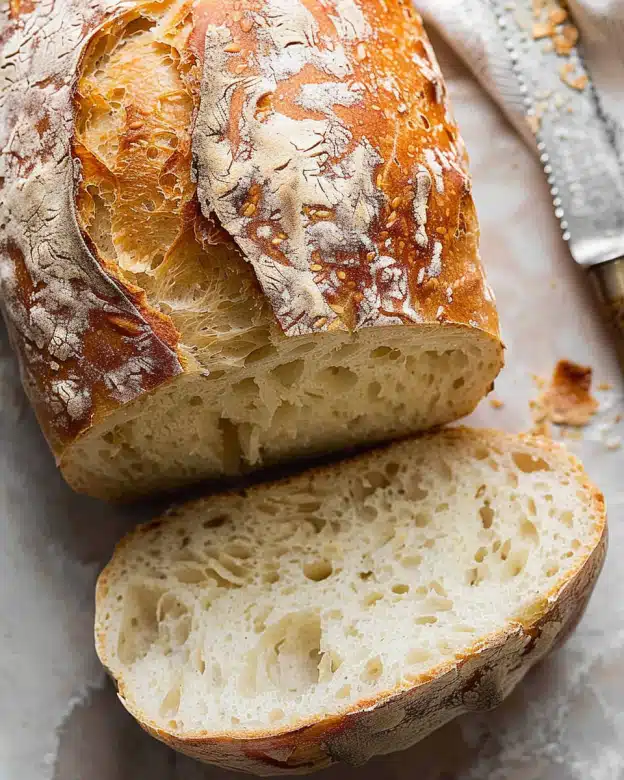
This easy no-knead yeast bread is an absolute game-changer! It’s perfect for anyone who loves crusty artisan bread with a chewy, flavorful interior but doesn’t want to spend hours in the kitchen. With just a few ingredients and minimal hands-on time, you can bake a beautiful loaf that rivals those from your favorite bakery. The best part? It’s super forgiving and doesn’t require any special equipment or expertise. The crispy crust, airy texture, and rich flavor will have you coming back for more!
Why You’ll Love This Recipe
This yeast bread recipe is perfect for beginners and experienced bakers alike. It requires no kneading, which means less mess and less work. The long fermentation process helps develop a complex, tangy flavor, while the Dutch oven method gives the bread a stunning, crispy crust. It’s also highly customizable, allowing you to make it ahead, store it, and even experiment with different flavors. Whether you serve it with butter, use it for sandwiches, or enjoy it fresh out of the oven, this bread is sure to impress.
Ingredients
-
3 cups (450g) flour (bread or plain/all-purpose)
-
2 tsp instant or rapid-rise yeast
-
2 tsp cooking or kosher salt (NOT table salt)
-
1 1/2 cups (375 ml) very warm tap water (NOT boiling)
-
1 1/2 tbsp flour (for dusting)
(Tip: You’ll find the full list of ingredients and measurements in the recipe card below.)
Directions
-
Mix Dough: In a large bowl, mix together the flour, yeast, and salt. Add the warm water, then use a wooden spoon to stir until all the flour is incorporated. The dough will be wet and sticky—don’t worry, this is normal.
-
Rise: Cover the bowl with cling wrap or a plate and leave it at room temperature for 2-3 hours until it doubles in size. The dough will be bubbly and wobbly. If it isn’t rising, try moving the bowl to a warmer spot.
-
Optional Refrigeration: You can refrigerate the dough for up to 3 days to develop more flavor. If you do, take it out 45-60 minutes before baking to bring it closer to room temperature.
-
Preheat Oven: Place a Dutch oven (10-inch or larger) in the oven and preheat to 450°F (230°C) for 30 minutes.
-
Shape Dough: On a floured surface, turn out the dough and gently fold the sides inward to form a rough round shape. Don’t worry about making it perfect—this is all about creating a shape that will fit in your Dutch oven.
-
Transfer to Paper: Place a large piece of parchment paper next to the dough, flip the dough over onto the paper, and reshape it if needed.
-
Bake: Carefully remove the hot Dutch oven from the oven and place the dough (with the parchment paper) into the pot. Cover with the lid and bake for 30 minutes. Remove the lid and bake for an additional 12 minutes or until the bread is deep golden brown.
-
Cool: Let the bread cool for 10 minutes before slicing.
Servings and Timing
-
Servings: 10-12 slices
-
Prep Time: 5 minutes
-
Cook Time: 40 minutes
-
Rising Time: 2-3 hours
-
Total Time: Approximately 2.5 to 3 hours (not including optional refrigeration)
Variations
-
Cheese Bread Version: Add cheese to the dough for a savory twist! Grated cheese can be folded into the dough before baking.
-
Herbed Bread: Mix in dried herbs like rosemary or thyme to give the bread a fragrant, flavorful kick.
-
Whole Wheat Version: Swap out some of the white flour for whole wheat flour. Just be sure to adjust the amount as whole wheat flour is more absorbent.
Storage/Reheating
-
Storage: Store the bread in an airtight container or ziplock bag. It stays fresh for 2 days at room temperature. After that, it’s best served toasted or warmed up.
-
Freezing: You can freeze the bread for up to 3 months. To reheat, simply place it in the oven at 350°F (175°C) for about 10-15 minutes to get it crispy again.
-
Reheating: For the freshest experience, reheat slices in a toaster or oven to bring back the crispy crust.
FAQs
How can I make this bread without a Dutch oven?
If you don’t have a Dutch oven, you can use a heavy roasting pan with a lid or a metal pan. Preheat the oven as usual, and place a tray of boiling water on the bottom of the oven to create a steamy effect. This will help you achieve that crispy crust.
Can I use regular yeast instead of instant yeast?
Yes, you can! If you’re using active dry yeast, dissolve it in the warm water before mixing it with the flour and salt. Then proceed as usual.
How can I make the bread more flavorful?
You can refrigerate the dough for up to 3 days to allow the yeast to develop more flavor. The longer the dough ferments, the more complex the taste.
Can I use whole wheat flour?
Yes, whole wheat flour works in this recipe. However, you’ll need to use a bit less than the white flour (about 30g or 1/4 cup less), and you may need to adjust the water slightly since whole wheat flour absorbs more moisture.
What should the dough look like when it’s ready to rise?
The dough should be wet and sticky but not runny. When it’s ready to rise, it should be bubbly and wobbly—similar to the consistency of jelly. It should also double in size within 2-3 hours.
Can I add extra ingredients like olives or nuts to the dough?
Yes, you can add mix-ins like olives, nuts, or dried fruits. Just fold them into the dough when you shape it, making sure not to deflate the bubbles too much.
What can I do if my dough isn’t rising?
If your dough isn’t rising after an hour, try moving it to a warmer location. Yeast thrives in warmth, so consider placing the bowl in a warm sink with water or in a draft-free area.
Can I use table salt instead of kosher salt?
You can, but you’ll need to use less if you’re using table salt—about 1 1/4 teaspoons instead of 2 teaspoons, as table salt is finer and denser.
Is this bread gluten-free?
This recipe uses all-purpose or bread flour, which contains gluten. If you’re looking for a gluten-free version, you would need to substitute with a gluten-free flour blend and adjust other ingredients accordingly.
Can I bake this bread without a preheated Dutch oven?
It’s best to use a preheated Dutch oven for the best results, as it creates steam that helps form the crispy crust. However, you can bake the bread on a baking sheet, just keep in mind that the crust may not be as crisp.
Conclusion
This no-knead artisan bread recipe is a must-try for anyone who loves fresh, homemade bread but doesn’t want the hassle of traditional kneading and proofing. The combination of simple ingredients, minimal effort, and a Dutch oven bake results in a loaf with a perfect, crispy crust and soft, chewy interior. Whether you’re a seasoned baker or just starting, this bread is sure to become a staple in your kitchen!

Easiest Yeast Bread
5 Stars 4 Stars 3 Stars 2 Stars 1 Star
No reviews
- Author: Alice
- Total Time: Approximately 2.5 to 3 hours (not including optional refrigeration)
- Yield: 10-12 slices
- Diet: Vegetarian
Description
This no-knead artisan yeast bread is a game-changer for bread lovers. With minimal effort, simple ingredients, and a Dutch oven, you’ll bake a crispy, golden loaf with a chewy, flavorful interior that rivals bakery bread.
Ingredients
3 cups (450g) flour (bread or plain/all-purpose)
2 tsp instant or rapid-rise yeast
2 tsp cooking or kosher salt (NOT table salt)
1 1/2 cups (375 ml) very warm tap water (NOT boiling)
1 1/2 tbsp flour (for dusting)
Instructions
- Mix the flour, yeast, and salt in a large bowl. Add warm water and stir with a wooden spoon until the dough is sticky and all flour is incorporated.
- Cover the bowl with cling wrap or a plate and leave it at room temperature for 2-3 hours to rise. The dough should double in size and become bubbly.
- If desired, refrigerate the dough for up to 3 days to develop more flavor. Remove from the fridge 45-60 minutes before baking to bring it to room temperature.
- Preheat your oven to 450°F (230°C) and place a Dutch oven (10-inch or larger) in the oven to heat up for 30 minutes.
- Turn the dough onto a floured surface and shape it into a rough round shape. Don’t worry about perfection—just aim for a shape that fits the Dutch oven.
- Place a large piece of parchment paper next to the dough, flip the dough over onto the paper, and reshape if necessary.
- Carefully remove the hot Dutch oven from the oven, and place the dough (with parchment paper) into the pot. Cover with the lid and bake for 30 minutes.
- Remove the lid and bake for an additional 12 minutes, or until the bread is deep golden brown.
- Let the bread cool for 10 minutes before slicing.
Notes
- For a crispier crust, brush with an egg wash before baking or place a tray of boiling water in the oven to create steam.
- Customize with ingredients like olives, nuts, or herbs by folding them into the dough before shaping.
- Store in an airtight container for up to 2 days at room temperature, or freeze for up to 3 months.
- If using whole wheat flour, adjust the water and flour ratio as whole wheat flour absorbs more moisture.
- Reheat slices in a toaster or oven for a fresh, crispy experience.
- Prep Time: 5 minutes
- Cook Time: 40 minutes
- Category: Bread
- Method: Baking
- Cuisine: French
Nutrition
- Serving Size: 1 slice
- Calories: 110
- Sugar: 0g
- Sodium: 300mg
- Fat: 0.5g
- Saturated Fat: 0g
- Unsaturated Fat: 0.5g
- Trans Fat: 0g
- Carbohydrates: 23g
- Fiber: 1g
- Protein: 3g
- Cholesterol: 0mg

