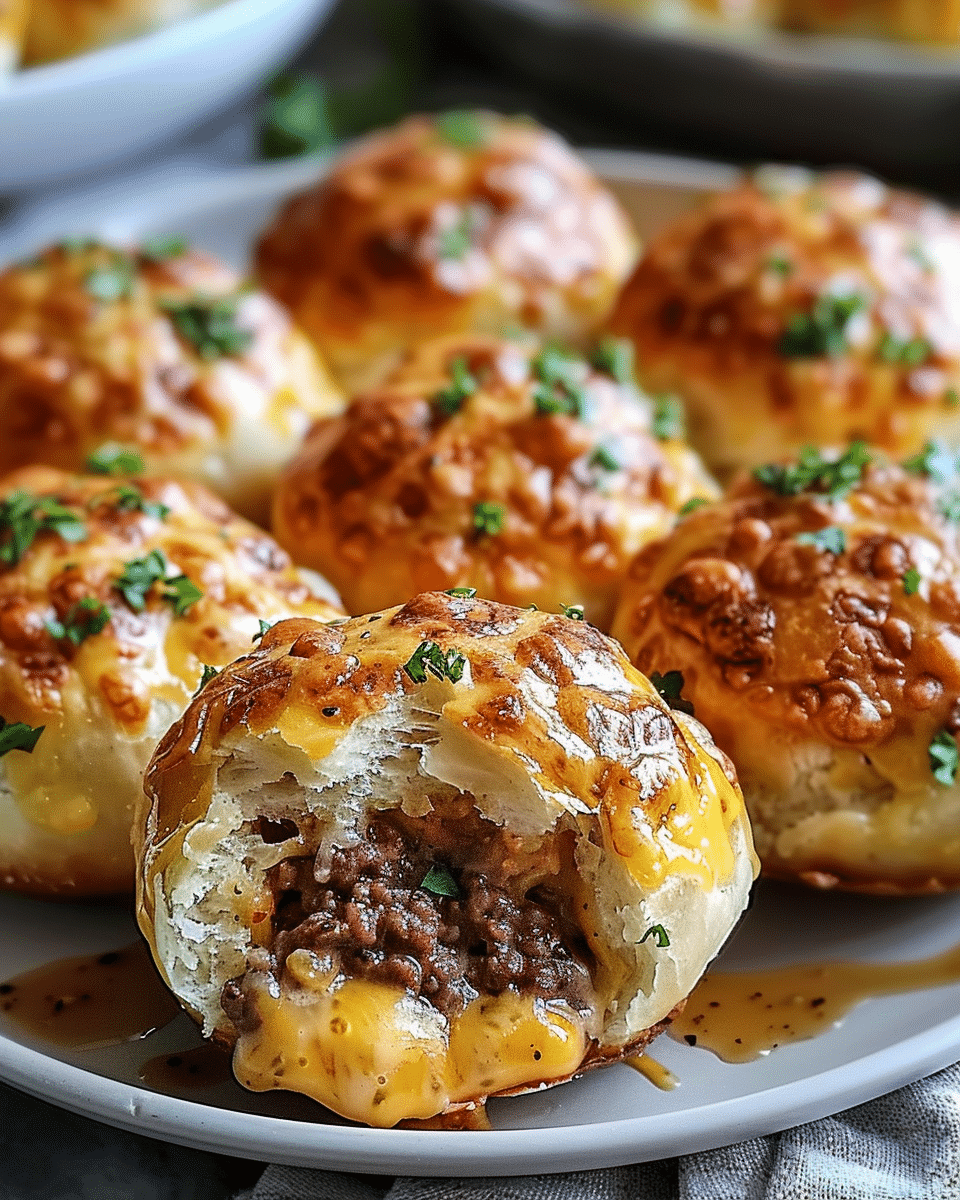
Garlic Parmesan Cheeseburger Bombs are a delightful fusion of classic cheeseburgers wrapped in soft biscuit dough and infused with garlic and Parmesan. These little flavor-packed bites are perfect for gatherings, game nights, or simply a cozy meal that feels indulgent yet easy to prepare.
Why You’ll Love This Recipe
I love how these cheeseburger bombs deliver everything I enjoy in a traditional cheeseburger, but in a fun, hand-held form. They’re cheesy, savory, and loaded with a delicious beef filling. The buttery garlic-Parmesan topping adds a rich and crispy finish that makes each bite irresistible. They’re also great for making ahead and reheating later, which makes them super convenient.
Ingredients
(Here’s a tip: Check out the full list of ingredients and measurements in the recipe card below.)
1 lb ground beef
1 cup shredded cheddar cheese
1/2 cup cream cheese, softened
1 tsp garlic powder
1 tsp onion powder
Salt and pepper, to taste
1 can (16 oz) refrigerated biscuit dough
1/4 cup grated Parmesan cheese
2 tbsp butter, melted
Fresh parsley, chopped (for garnish)
Directions
- I start by cooking the ground beef in a skillet over medium heat for about 5-7 minutes until it’s fully cooked, then I drain the excess grease.
- While the beef cools slightly, I mix it with shredded cheddar cheese, cream cheese, garlic powder, onion powder, salt, and pepper.
- I open the can of biscuit dough and flatten each biscuit into a 4-inch circle.
- I spoon some of the beef mixture into the center of each biscuit, fold the dough over the filling, and pinch the edges tightly to seal.
- I place the bombs on a parchment-lined baking sheet, brush the tops with melted butter, sprinkle with Parmesan, and bake at 375°F (190°C) until golden brown.
- Once baked, I garnish them with fresh parsley and serve warm.
Servings and timing
This recipe makes 12 cheeseburger bombs. It takes about 15 minutes to prepare and another 15 minutes to bake, making the total time around 30 minutes.
Variations
I like switching up the cheese—sometimes I use mozzarella or pepper jack for a different flavor. I also add finely chopped pickles or jalapeños to the beef mix when I want a bit of zing. For a spicier version, I sprinkle crushed red pepper flakes into the filling.
storage/reheating
These are best fresh, but I store any leftovers in an airtight container in the fridge for up to 3 days. To reheat, I pop them in a 350°F oven for about 10 minutes or microwave them for 30-45 seconds. I avoid reheating too long so the dough stays soft and not rubbery.
FAQs
Can I use homemade dough instead of refrigerated biscuit dough?
Yes, I sometimes use my own biscuit or pizza dough when I have extra time. It works just as well.
How do I keep the bombs from opening while baking?
I make sure to firmly pinch the edges and place the seam side down on the baking sheet to keep everything sealed.
Can I freeze these cheeseburger bombs?
Absolutely. I freeze them after baking and reheat in the oven directly from frozen at 350°F for about 15-20 minutes.
What can I serve with these?
I usually serve them with dipping sauces like ketchup, mustard, or ranch. A simple salad on the side works well too.
Are these gluten-free?
Not with regular biscuit dough, but I use a gluten-free biscuit dough or make my own gluten-free version to accommodate dietary needs.
Conclusion
These Garlic Parmesan Cheeseburger Bombs are a savory and cheesy twist on traditional comfort food. I love making them for guests or a fun family dinner because they’re quick, crowd-pleasing, and packed with flavor. Whether fresh out of the oven or reheated the next day, they never fail to satisfy.
Print
Garlic Parmesan Cheeseburger Bombs
- Total Time: 30 minutes
- Yield: 12 bombs
- Diet: Low Lactose
Description
Garlic Parmesan Cheeseburger Bombs are savory, handheld bites filled with cheesy ground beef and wrapped in biscuit dough. Topped with garlic butter and Parmesan, they’re a fun and delicious twist on classic cheeseburgers.
Ingredients
1 lb ground beef
1 cup shredded cheddar cheese
½ cup cream cheese, softened
1 tsp garlic powder
1 tsp onion powder
Salt and pepper, to taste
1 can (16 oz) refrigerated biscuit dough
¼ cup grated Parmesan cheese
2 tbsp butter, melted
Fresh parsley, chopped (for garnish)
Instructions
- Preheat oven to 375°F (190°C) and line a baking sheet with parchment paper.
- Cook ground beef in a skillet over medium heat for 5–7 minutes until fully browned. Drain excess grease.
- In a bowl, mix cooked beef with cheddar cheese, cream cheese, garlic powder, onion powder, salt, and pepper.
- Flatten each biscuit into a 4-inch circle. Spoon beef mixture into the center of each and fold over, pinching edges to seal.
- Place bombs seam-side down on baking sheet. Brush tops with melted butter and sprinkle with Parmesan.
- Bake for 15 minutes or until golden brown. Garnish with fresh parsley and serve warm.
Notes
- Store leftovers in an airtight container in the fridge for up to 3 days.
- Reheat in a 350°F oven for 10 minutes or microwave for 30–45 seconds.
- Try using different cheeses or adding chopped pickles or jalapeños for variation.
- Homemade or gluten-free dough can be substituted.
- Freeze after baking and reheat from frozen at 350°F for 15–20 minutes.
- Prep Time: 15 minutes
- Cook Time: 15 minutes
- Category: Appetizer
- Method: Baking
- Cuisine: American
Nutrition
- Serving Size: 1 bomb
- Calories: 230
- Sugar: 2g
- Sodium: 400mg
- Fat: 14g
- Saturated Fat: 7g
- Unsaturated Fat: 7g
- Trans Fat: 0g
- Carbohydrates: 16g
- Fiber: 1g
- Protein: 10g
- Cholesterol: 35mg

