Biscoff Cheesecake is a rich and indulgent dessert that combines the creamy texture of cheesecake with the irresistible flavor of Biscoff cookies and spread. Perfect for a special occasion or a simple weeknight treat, this dessert is sure to wow your guests and satisfy your sweet tooth.
Why You’ll Love This Recipe
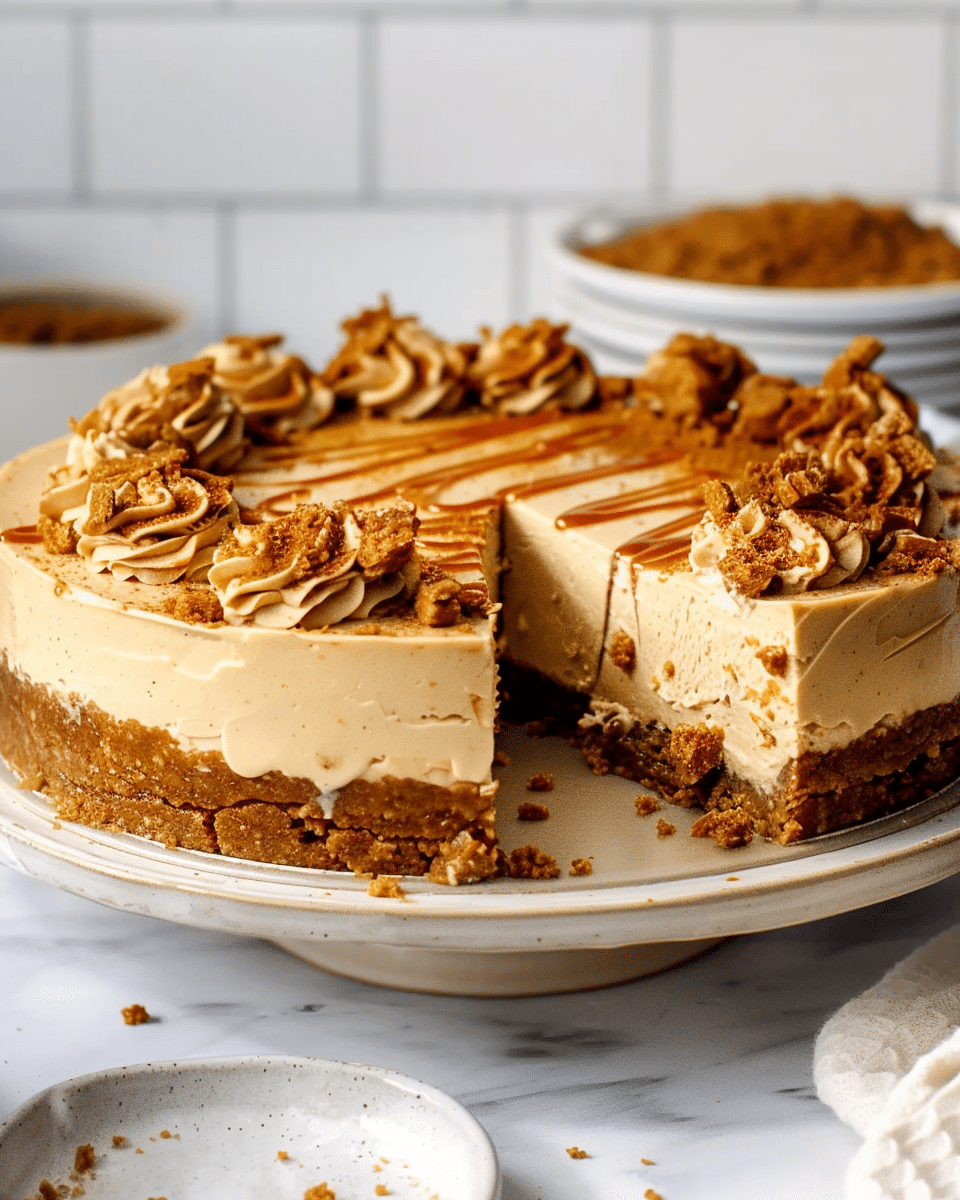
Biscoff Cheesecake brings together two fan-favorite treats: the smooth, velvety cheesecake and the unique spiced flavor of Biscoff cookies. The crumbly, buttery base is made from Biscoff biscuits, while the cheesecake filling features a delightful combination of cream cheese, Biscoff spread, and a touch of vanilla and sour cream. Topped with more Biscoff spread and crumbled biscuits, this cheesecake is a true showstopper. It’s decadent, flavorful, and just the right amount of sweet, making it the perfect dessert for any occasion.
Ingredients
For the Base
-
250 grams Biscoff biscuits
-
75 grams unsalted butter
For the Cheesecake
-
1000 grams cream cheese
-
150 grams granulated sugar
-
150 grams brown sugar
-
150 grams sour cream
-
2 tablespoons vanilla paste
-
200g Biscoff spread
-
3 large eggs + 2 yolks
For the Top
-
150 grams Biscoff spread
-
8 Biscoff biscuits
(Tip: You’ll find the full list of ingredients and measurements in the recipe card below.)
Directions
-
Preheat the oven to 175°C (350°F) and line the bottom of an 8- or 9-inch springform pan with parchment paper. Wrap two layers of foil around the base and set aside.
-
Crush the Biscoff cookies in a food processor or with a rolling pin and transfer them to a bowl. Add the melted butter and mix until it looks like wet sand.
-
Press the cookie crumbs into the pan, pressing it firmly in the bottom and up the sides. Then, bake for 8-10 minutes and set aside. Reduce the oven temperature to 165°C (325°F).
-
In a large bowl, beat the cream cheese with an electric mixer until smooth and lump-free. Scrape the bottom and sides of the bowl, add the sugars, and beat again until thick, smooth, and fluffy.
-
Add the sour cream, vanilla, and Biscoff spread, and mix by hand until smooth. Scrape the sides and bottom of the bowl, then mix in the eggs and yolks one by one until well blended.
-
Pour the batter over the crust. Place the pan into a larger (10- or 12-inch) baking pan wrapped in foil. Place the two pans into a roasting pan, then place all three in the oven. Pour hot water into the roasting pan, close the door, and bake for 60 minutes.
-
Turn the oven off and open the door a crack—just a few inches. Let the cheesecake cool for 60 minutes, then remove it from the oven and cool for another 60 minutes on the counter.
-
When cold, cover and place in the fridge for 8 hours or overnight.
-
When ready to serve, warm the Biscoff spread and spoon it over the cheesecake. Add whipped cream and Biscoff cookies, if desired. Slice, serve, and enjoy!
Servings and Timing
-
Servings: 12
-
Prep time: 20 minutes
-
Cook time: 60 minutes
-
Cooling time: 2 hours
-
Refrigeration time: 8 hours or overnight
Variations
-
Chocolate Drizzle: Add a drizzle of melted chocolate over the Biscoff spread topping for an extra layer of flavor.
-
Biscoff Crust: Instead of using the Biscoff biscuits for the crust, you can try adding a mixture of chocolate cookies to give it a different flavor profile.
-
Spices: For extra warmth, sprinkle some cinnamon or nutmeg into the cheesecake filling to complement the Biscoff flavor.
-
Mini Cheesecakes: To make individual servings, divide the crust and filling into muffin tins or mini springform pans and bake accordingly. Adjust baking time if needed.
Storage/Reheating
-
Storage: Store leftover cheesecake in an airtight container in the refrigerator for up to 5 days.
-
Freezing: You can freeze the cheesecake for up to 3 months. Wrap it tightly with plastic wrap and foil before freezing. Thaw in the fridge overnight before serving.
-
Reheating: It’s best to serve this cheesecake cold, but if you prefer it slightly warmed, you can microwave individual slices for 10-15 seconds.
FAQs
1. Can I use a different type of biscuit for the base?
Yes, you can substitute Biscoff biscuits with graham crackers or other cookies, but the flavor may differ.
2. What if I don’t have a springform pan?
You can use a regular cake pan lined with parchment paper, but a springform pan makes it easier to remove the cheesecake without damaging it.
3. How do I know when the cheesecake is done baking?
The cheesecake should be set at the edges but still slightly jiggly in the center. It will firm up as it cools.
4. Can I make this cheesecake without eggs?
Unfortunately, eggs are essential for the texture of this cheesecake, so they cannot be omitted. You could try egg substitutes, but the results may vary.
5. Can I use low-fat cream cheese?
You can use low-fat cream cheese, but the texture may be less creamy and rich than when using full-fat cream cheese.
6. Do I need to bake the crust?
Yes, the crust needs to be baked for a few minutes to set and ensure it’s firm enough to hold the cheesecake filling.
7. Can I top the cheesecake with fruit instead of Biscoff?
Yes, fresh fruit like berries, raspberries, or strawberries can be a delicious alternative to the Biscoff topping.
8. How can I avoid cracks in my cheesecake?
To avoid cracks, ensure the cheesecake cools slowly by leaving the oven door ajar as it cools and refrigerating it for several hours or overnight before serving.
9. Is it necessary to use a water bath for baking?
Yes, a water bath helps prevent the cheesecake from cracking and ensures even cooking by maintaining moisture.
10. How do I warm the Biscoff spread for the topping?
You can gently warm the Biscoff spread in the microwave in 10-second intervals or on the stove over low heat until it becomes pourable.
Conclusion
Biscoff Cheesecake is a dessert that combines indulgence and flavor in every bite. With a creamy filling, a spiced Biscoff crust, and a rich topping, it’s the perfect treat for any occasion. Whether you’re serving it for a special event or enjoying it at home, this cheesecake is sure to be a crowd-pleaser.
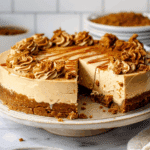
Biscoff Cheesecake
5 Stars 4 Stars 3 Stars 2 Stars 1 Star
No reviews
- Author: Alice
- Total Time: 12 hours 20 minutes
- Yield: 12 servings
- Diet: Vegetarian
Description
Biscoff Cheesecake is a rich, creamy dessert that combines the smoothness of classic cheesecake with the unique spiced flavor of Biscoff cookies. Topped with Biscoff spread and crumbled biscuits, it’s a luxurious and indulgent treat perfect for any occasion.
Ingredients
For the Base: 250 grams Biscoff biscuits, 75 grams unsalted butter
For the Cheesecake: 1000 grams cream cheese, 150 grams granulated sugar, 150 grams brown sugar, 150 grams sour cream, 2 tablespoons vanilla paste, 200g Biscoff spread, 3 large eggs + 2 yolks
For the Top: 150 grams Biscoff spread, 8 Biscoff biscuits
Instructions
- Preheat the oven to 175°C (350°F) and line the bottom of an 8- or 9-inch springform pan with parchment paper. Wrap two layers of foil around the base and set aside.
- Crush the Biscoff cookies in a food processor or with a rolling pin and transfer them to a bowl. Add melted butter and mix until it looks like wet sand. Press the cookie crumbs into the pan, pressing it firmly in the bottom and up the sides. Then, bake for 8-10 minutes and set aside. Reduce the oven temperature to 165°C (325°F).
- In a large bowl, beat the cream cheese with an electric mixer until smooth and lump-free. Scrape the bottom and sides of the bowl, add the sugars, and beat again until thick, smooth, and fluffy. Add the sour cream, vanilla, and Biscoff spread, and mix by hand until smooth. Scrape the sides and bottom of the bowl, then mix in the eggs and yolks one by one until well blended.
- Pour the batter over the crust. Place the pan into a larger (10- or 12-inch) baking pan wrapped in foil. Place the two pans into a roasting pan, then place all three in the oven. Pour hot water into the roasting pan, close the door, and bake for 60 minutes.
- Turn the oven off and open the door a crack—just a few inches. Let the cheesecake cool for 60 minutes, then remove it from the oven and cool for another 60 minutes on the counter.
- When cold, cover and place in the fridge for 8 hours or overnight.
- When ready to serve, warm the Biscoff spread and spoon it over the cheesecake. Add whipped cream and Biscoff cookies, if desired. Slice, serve, and enjoy!
Notes
- For a chocolatey twist, add a drizzle of melted chocolate over the Biscoff spread topping.
- For a different crust flavor, try adding a mixture of chocolate cookies instead of just Biscoff biscuits.
- If you prefer a more spiced flavor, sprinkle cinnamon or nutmeg into the cheesecake filling.
- Prep Time: 20 minutes
- Cook Time: 60 minutes
- Category: Dessert
- Method: Baking
- Cuisine: American
Nutrition
- Serving Size: 1 slice
- Calories: 450
- Sugar: 38g
- Sodium: 250mg
- Fat: 30g
- Saturated Fat: 18g
- Unsaturated Fat: 8g
- Trans Fat: 0g
- Carbohydrates: 40g
- Fiber: 2g
- Protein: 6g
- Cholesterol: 115mg

