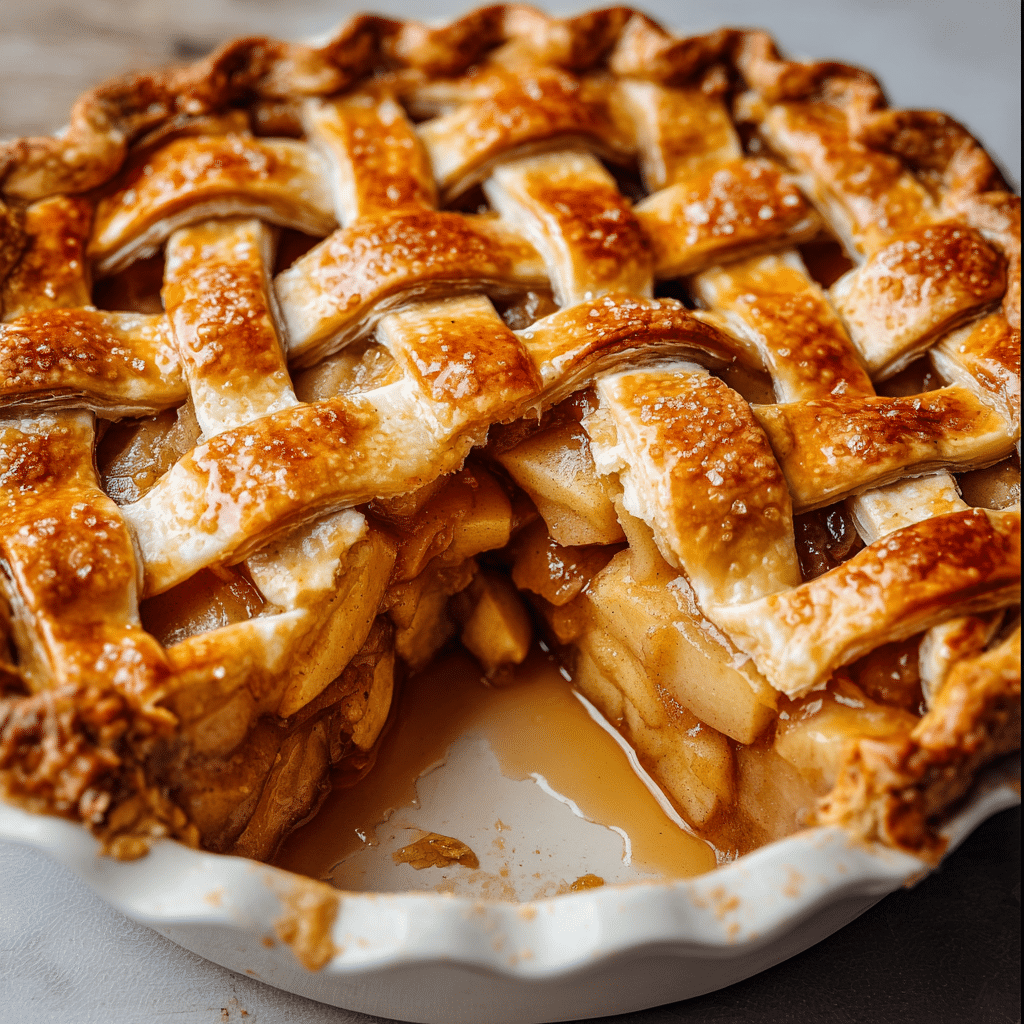
If you’ve ever longed for an utterly comforting, crowd-pleasing dessert, this Perfect Homemade Apple Pie Recipe is pure magic in every slice. With a golden, flaky double crust, a luscious, cinnamon-spiced filling using a blend of apples, and just the right touch of tartness from lemon, this pie is everything an apple pie lover dreams of. I’ve made it countless times, and I promise—each step leads to a bakery-worthy result. Whether you’re serving it on a holiday table or for a cozy family dinner, the aroma of bubbling apples and buttery pastry will bring everyone running to the kitchen. Get ready to fall deeply in love with homemade apple pie all over again!
Ingredients You’ll Need
The ingredients for this Perfect Homemade Apple Pie Recipe are simple, yet each one is absolutely essential. Every addition—whether zesty lemon, an aromatic hint of cardamom, or that final sprinkle of raw sugar—plays a part in creating irresistible flavor, a stunning presentation, and that iconic pie texture we all adore.
- Homemade double pie crust (2 sheets of pie dough): Nothing beats a tender, flaky crust made from scratch for melt-in-your-mouth results.
- Lemon zest (1/4 teaspoon): Adds a subtle brightness to the filling, enhancing the apple flavors.
- Lemon juice (2 tablespoons): Keeps apples fresh and prevents browning while delivering a gentle tang.
- Apples (5 pounds, mix of Granny Smith, Gala, Golden Delicious): Blending apple varieties gives the filling perfect balance between tart and sweet.
- Packed brown sugar (3/4 cup): Brings real depth and a caramel undertone to the filling.
- Granulated sugar (3/4 cup): Lends just the right amount of sweetness and balances the brown sugar.
- All-purpose flour (5 tablespoons): Thickens the filling so it slices beautifully and holds together.
- Kosher salt (1/4 teaspoon): Makes all the flavors pop—the secret hero ingredient in pie crust and filling.
- Cinnamon (1 & 1/2 teaspoons): The classic spice that makes your kitchen smell like autumn.
- Nutmeg (3/4 teaspoon): Adds warmth and a hint of nostalgia to each bite.
- Cardamom (1/2 teaspoon, optional): A whisper of sophistication and floral sweetness—try it if you’re feeling adventurous!
- Vanilla extract (1 teaspoon): Elevates and ties together all the other flavors in the filling.
- Milk (1 tablespoon): Brushed on top for a tender, golden finish.
- Beaten egg (1 tablespoon, optional): For an extra-glossy, professional sheen on the crust.
- Raw sugar (1 tablespoon): Sprinkled for a delightful crunch and sparkle on your finished pie.
How to Make
Step 1: Choose Your Apples
The true foundation of this Perfect Homemade Apple Pie Recipe is your apples. Using a blend of Granny Smith, Gala, and Golden Delicious gives that perfect harmony of tart and sweet. I like to mix up the varieties every time for a bit of fun—just be sure to aim for about 5 pounds, or roughly 11 large apples.
Step 2: Make the Filling
Start by zesting and juicing half a lemon straight into your skillet. Peel and slice apples as thinly as possible—around 1/8 inch ensures they cook evenly and soak up those gorgeous spices. Toss them into the skillet right away to prevent browning. Next, add your brown sugar, granulated sugar, flour, salt, cinnamon, nutmeg, and cardamom if you’d like a pop of something special. Cover the pan and let everything cook gently, stirring every few minutes. You want the apples just fork-tender and still holding their shape. The aroma here is incredible!
Step 3: Cool the Apple Filling
Pour the steaming filling onto a shallow pan and spread it out, then chill in the refrigerator or freezer. This cool-down step is key—it stops the apples from overcooking in the oven and keeps layers firm and sliceable. If you have the time, letting it cool at room temperature works, but chilling is fastest.
Step 4: Assemble the Pie
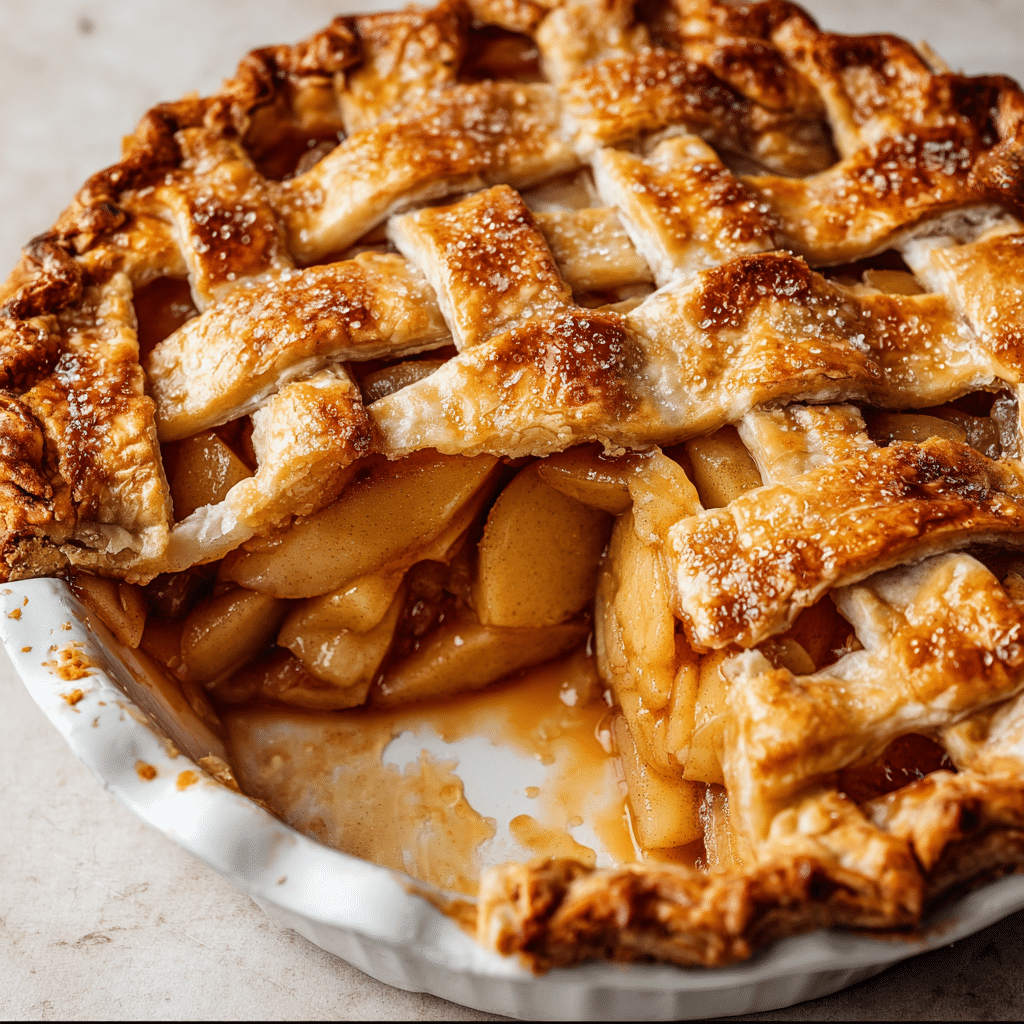
Roll out your first sheet of dough and gently drape it over your pie dish, letting the extra hang over. Mound the chilled filling evenly inside, scraping every drop of gorgeous caramelized juices from the pan. Add your top crust, then crimp the edges—lattice or full cover, it’s your call! Make sure to add ventilation slits if you haven’t already woven a lattice. A quick chill in the fridge now helps prevent shrinkage and delivers that irresistible flaky pastry.
Step 5: Preheat the Oven
Get your oven roaring hot—425°F makes sure the crust sets before the filling bubbles over. While it preheats for 20 to 25 minutes, your pie crust will firm up even more in the fridge.
Step 6: Prepare the Crust for Baking
Brush the crust with milk or a beaten egg, depending on your finish preference, then sprinkle with raw sugar for that bakery sparkle and signature crunch. This step turns your pie from homemade to masterpiece.
Step 7: Bake the Pie
Set your pie on a baking sheet to catch any juicy drips. Bake at the higher temperature for 15 minutes, then protect your delicate crust edges with a foil shield. Reduce the temperature to 350°F and bake for another 40 to 45 minutes—watch for a golden color and bubbling, fragrant filling that sends everyone in the house drifting toward the kitchen!
Step 8: Cool the Pie
This is the hardest part: let your pie cool on a rack for at least four hours. It allows the filling to thicken properly, making for neat, picture-perfect slices with no runny surprises. If you can wait—trust me, it’s worth it!
Step 9: Serve
Finally, cut generous wedges and enjoy with a scoop of creamy vanilla ice cream or a drizzle of caramel. This is the moment when all your patience and effort pay off—the first bite will win hearts instantly.
How to Serve
Garnishes
A warm slice of this pie already shines, but a scoop of vanilla ice cream melting into the flaky pastry is classic and always welcome. For a real wow-factor, drizzle with caramel sauce or a sprinkle of extra cinnamon sugar on top just before serving. A dusting of powdered sugar around the edges of the crust makes for a special holiday touch, too!
Side Dishes
This Perfect Homemade Apple Pie Recipe pairs beautifully with lightly sweetened whipped cream, a handful of sharp cheddar cheese slices (a time-honored combo!), or even a tangy spoonful of crème fraîche. If you’re serving dessert after a meal, keep sides simple and let the pie steal the spotlight.
Creative Ways to Present
For an effortless, rustic look, serve straight from the pie dish with a big serving spoon. For more formal occasions, slice the pie in advance and arrange on a cake stand, garnished with fanned apple slices or a sprig of mint. Individual mini pies made in ramekins are a charming touch for dinner parties, offering each guest their own personal treat.
Make Ahead and Storage
Storing Leftovers
If you’re lucky enough to have leftovers, simply cover the pie loosely with plastic wrap and keep at room temperature for up to two days. After that, move it to the refrigerator for another couple of days. The flavors often deepen as it rests, making each subsequent slice just as lovely.
Freezing
This Perfect Homemade Apple Pie Recipe is freezer-friendly! Once completely cooled, wrap individual slices or the whole pie tightly in plastic wrap, then foil. Store in your freezer for up to three months. You can also freeze the cooked and cooled apple filling alone—perfect for quick pies, crisps, or cobblers down the road.
Reheating
To enjoy pie as if it were freshly baked, reheat slices in a 350°F oven tented with foil for about 15 minutes, or until warmed through. Skip the microwave if you can—the oven restores that gorgeous, crispy crust and gently warms the filling.
FAQs
What’s the best type of apple for this pie?
Using a mix of Granny Smith, Gala, and Golden Delicious gives the best balance of tart, sweet, and juicy textures in the Perfect Homemade Apple Pie Recipe. Mixing apple types also means your filling won’t turn mushy or bland.
Can I use store-bought pie dough instead of homemade?
Absolutely! While homemade dough gives you a flakier, richer crust, store-bought pie dough is a handy shortcut that still works great, especially if you’re short on time.
Do I really need to cool the filling before assembling the pie?
Cooling the filling is crucial! It prevents the bottom crust from getting soggy and helps the whole pie keep its shape after baking. For the prettiest slices, don’t skip this step.
What if I don’t have cardamom?
No worries! Cardamom is optional and simply adds a hint of floral spice. If you don’t have it, your Perfect Homemade Apple Pie Recipe will still turn out absolutely delicious with just cinnamon and nutmeg.
How can I keep my pie crust from burning?
Use a homemade pie shield: just some foil with a hole cut in the center! Place it over your pie after the first 15 minutes of baking so the edges stay perfectly golden, not burnt, while the center cooks through.
Final Thoughts
If you’ve ever wondered if you could master the best apple pie at home, this Perfect Homemade Apple Pie Recipe is your answer. Every slice offers comfort, nostalgia, and pure dessert bliss. I hope you bake it soon for your family or friends, and when you take that first bite, you’ll know you have a new favorite pie to cherish forever!
Print
Perfect Homemade Apple Pie Recipe
- Total Time: 1 hour 40 minutes
- Yield: About 8 slices
- Diet: Vegetarian
Description
This Best Homemade Apple Pie recipe is an absolute game-changer. With a double crust, a cooked apple filling that provides the perfect texture and flavor, and a simple step-by-step process, you’ll never want store-bought again. The trick lies in using a mix of apples, a flavorful filling, and a flaky, golden crust.
Ingredients
Homemade Double Pie Crust:
- 2 sheets of pie dough
Apple Filling:
- 1/4 teaspoon lemon zest
- Juice from half a lemon (about 2 tablespoons)
- 5 pounds apples (a mix of Granny Smith, Gala, and Golden Delicious)
- 3/4 cup packed brown sugar
- 3/4 cup granulated sugar
- 5 tablespoons all-purpose flour
- 1/4 teaspoon kosher salt
- 1 & 1/2 teaspoons cinnamon
- 3/4 teaspoon nutmeg
- 1/2 teaspoon cardamom (optional)
- 1 teaspoon vanilla extract
For Assembly and Baking:
- 1 tablespoon milk (for brushing on pie)
- 1 tablespoon beaten egg (optional, for brushing on pie)
- 1 tablespoon raw sugar (for topping pie)
Instructions
- Choose Your Apples: You’ll need a mix of apples for the perfect balance.
- Make the Filling: Zest lemon peel, add lemon juice, slice apples, cook with sugars and spices until tender, then stir in vanilla extract.
- Cool the Apple Filling: Spread cooked filling in a pan and chill.
- Assemble the Pie: Fit one pie dough in a dish, add filling, top with second dough, vent, and chill.
- Preheat the Oven: Get the oven hot at 425°F (220°C).
- Prepare the Crust: Brush with milk, sprinkle sugar on top.
- Bake the Pie: Bake at 425°F (220°C) for 15 minutes, then at 350°F (175°C) for 40-45 minutes.
- Cool the Pie: Let it cool for about 4 hours on a wire rack.
- Serve: Slice and enjoy with ice cream or caramel sauce.
Notes
- Freezing Tip: Freeze the cooled apple filling in a ziplock bag for up to 3 months.
- Storage: Store leftover pie on the counter for up to 2 days, covered with plastic wrap. After that, refrigerate.
- Prep Time: 30 minutes
- Cook Time: 1 hour 10 minutes
- Category: Dessert
- Method: Baking
- Cuisine: American
Nutrition
- Serving Size: 1 slice
- Calories: Approximately 350 kcal
- Sugar: Approximately 25g
- Sodium: Approximately 200mg
- Fat: Approximately 15g
- Saturated Fat: Approximately 8g
- Unsaturated Fat: Approximately 7g
- Trans Fat: 0g
- Carbohydrates: Approximately 50g
- Fiber: Approximately 4g
- Protein: Approximately 2g
- Cholesterol: Approximately 20mg

